San Angelo’s Radio Controlled Aircraft Airfield! Spectators Welcome! If you see aircraft flying at the field, please come in and visit! Contact us at angelorcflyers@gmail.com or contact our President Charlie Campbell at 325-651-8027.
Club Trainer
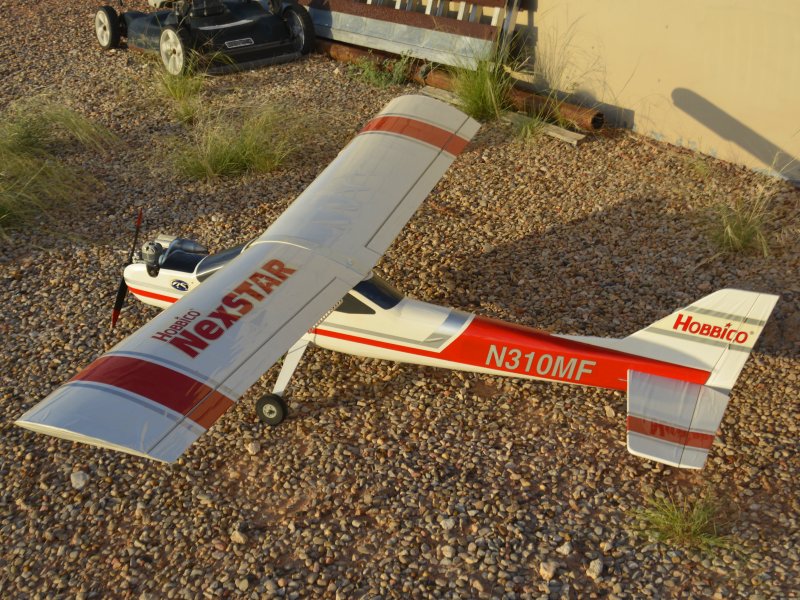
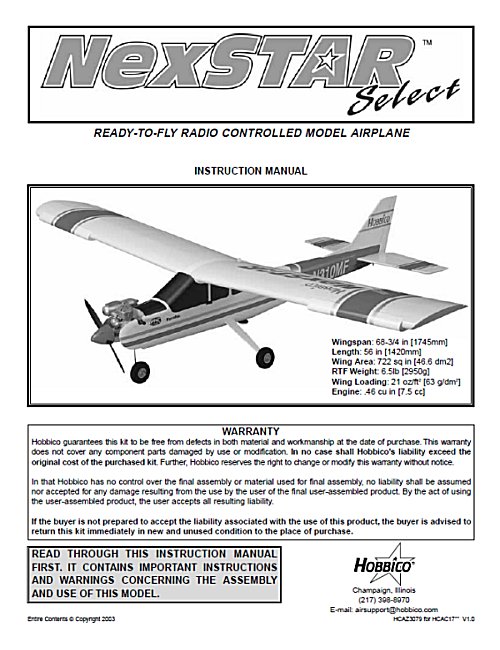
The Club Trainer Aircraft: Hobbico Nexstar
Thanks to a generous donation from a former flyer, the club was gifted with a Hobbico Nexstar Trainer Aircraft. In addition to the aircraft, we were also given a Hobbico Ultra Totebox with all the accessories to setup and fly the aircraft. A special thanks to Gary Jones and John “Bubba” Brotherton who got the aircraft into flying condition. The trainer aircraft is available to all our members to use to train future pilots who want to get into the hobby, however, you will need to provide and fuel (see instructions below). Please contact any of our officers to get access to the aircraft. Before using the aircraft, read the instructions below which cover requirements, assembly and setup procedures. The manufacturer’s manuals for the aircraft, engine and totebox are posted at the bottom of the page.
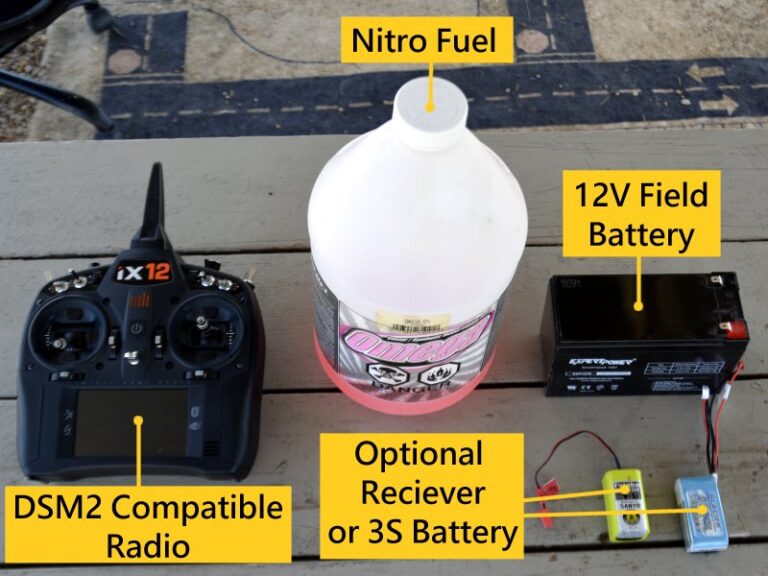
What you will need to provide:
Prior to using the trainer, you will need to provide fuel, a Spektrum DSM2 compatible radio, 12V field battery and a 4.8 Reciever battery or 3S battery. (Note: There is a receiver battery in the totebox, however, it reliability is unknown.) Also, the 12V field battery is not necessary if you have a manual glow plug starter, manual fuel pump and hand start the engine.
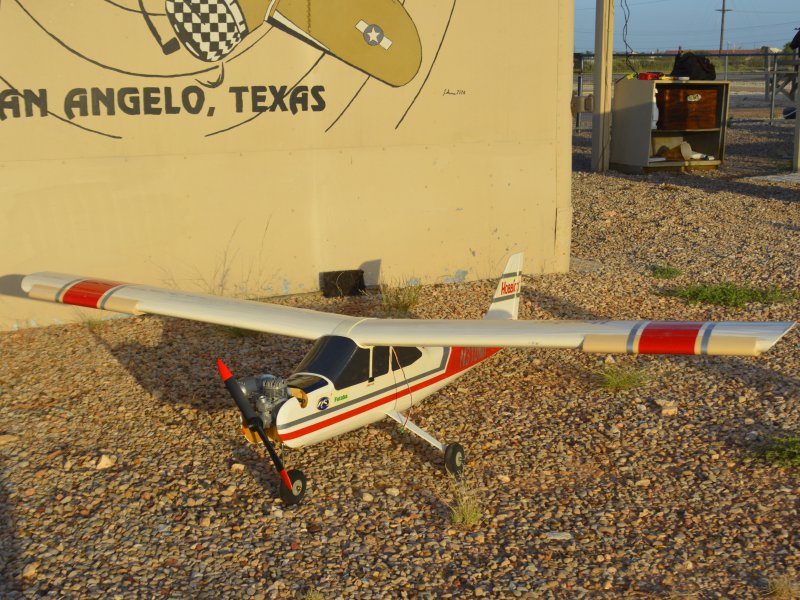
Nexstar Trainer Description
68.75″ Wingspan, 56″ Length, OS Max .46FXi engine with an OS8 glowplug and an Orange DSM2 nine channel receiver. The plane also has leading edge extentions and airbrake flaps are installed to decrease speed and add flight stability to the aircraft. The aircraft has an eight ounce fuel tanks which will give you about 8 minutes of flight time.
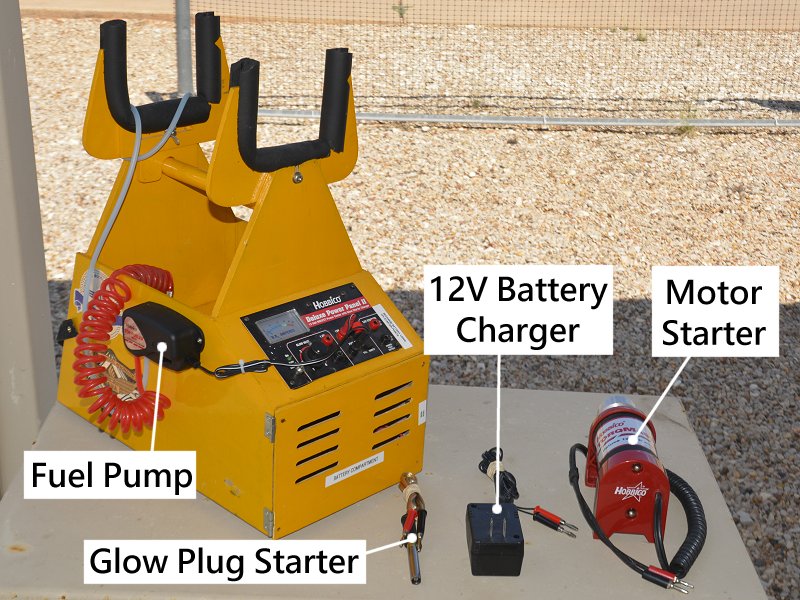
Hobbico Tote Box & Accessories
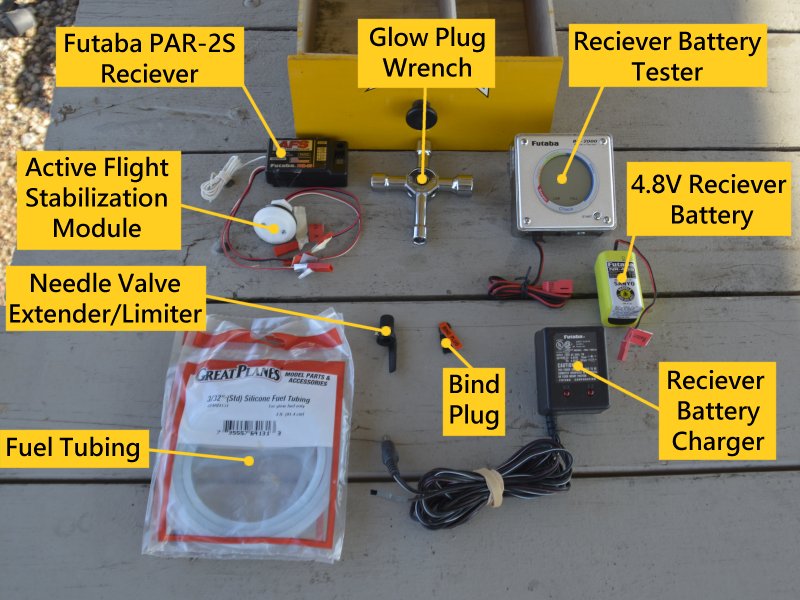
In the outer shelf of the tote box there is a fuel pump with hoses, glow plug starter, 12V battery charger and a 12V motor starter. All these can be powered by a 12V field battery (not provided). In the side drawer, you will find a glow plug wrench, receiver battery tester, a 4.8V receiver battery, reciever battery charger, bind plug, extra fuel tubing and a needle valve extender/limiter for the aircraft motor. An optional Futaba PAR-2S receiver with an Active Flight Stabilization Module is also in the toolbox to substitute with the Orange receiver in the aircraft. You’ll need a compatible Futaba radio to use it.
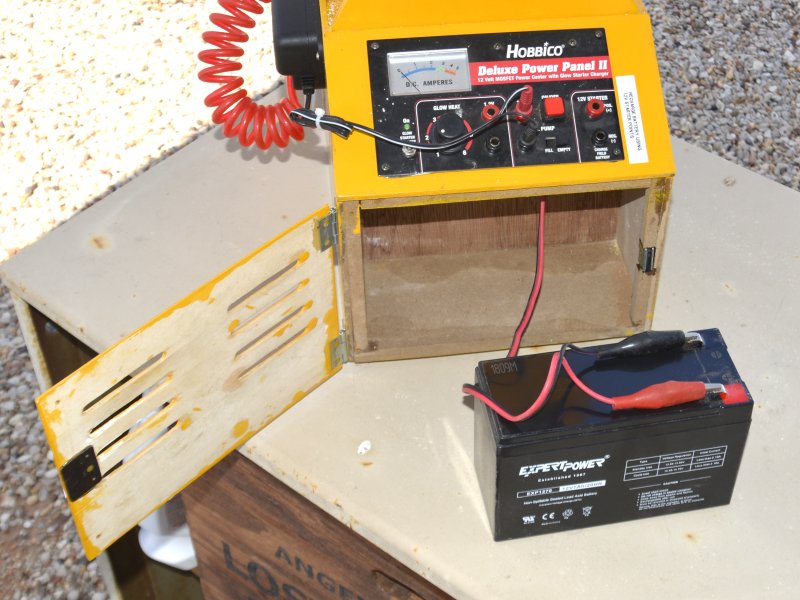
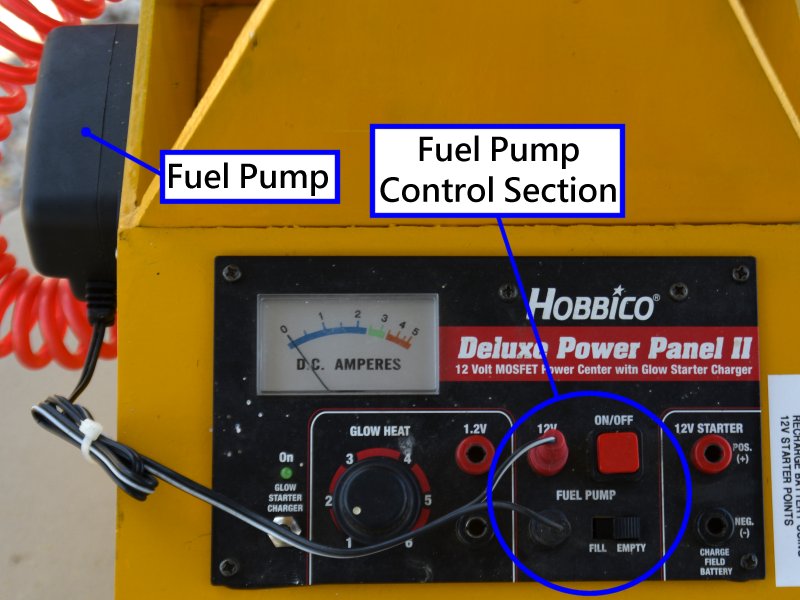
If you have a 12V field battery, you can use it to power the tote accessories. Open up the battery compartment and connect the leads to the battery. You can then connect the accessories like the pump, glow plug starter and motor starter to the Hobbico Power Panel.
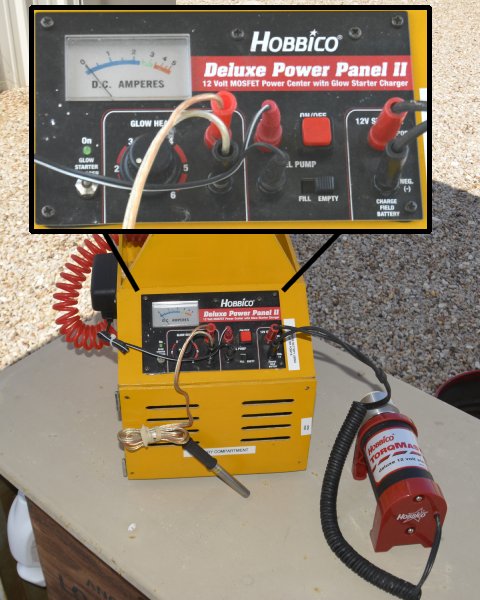
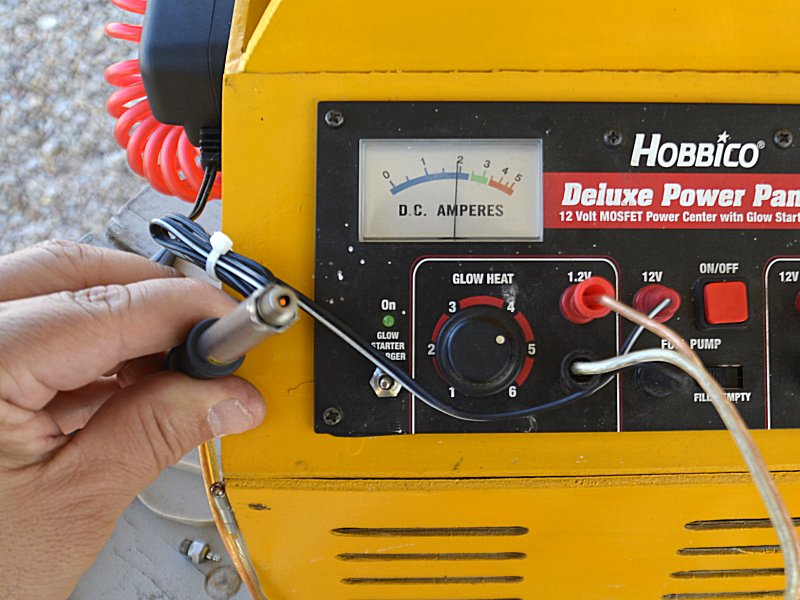
When using the glow plug starter, adjust the current using the dial, starting at setting 1, then increase.
When using the fuel pump, set the switch to Fill or Empty, then press the button.
Hobbico Tote Box Setup
Nexstar Aircraft Setup
Warning! For safety, the plane should be setup on the Aircraft Stations by the runway. The following pictures were taken on the workbenches for instruction purposes only.
Prior to connecting a battery to the aircraft, turn the On/Off switch to Off.
Power up the trainer using a 4.8V receiver battery by plugging the battery directly into the On/Off switch connector.
Power up the receiver using a 3S battery by connecting the battery’s balance connector to the 10A BEC in the aircraft, then connecting that to the On/Off switch connector.
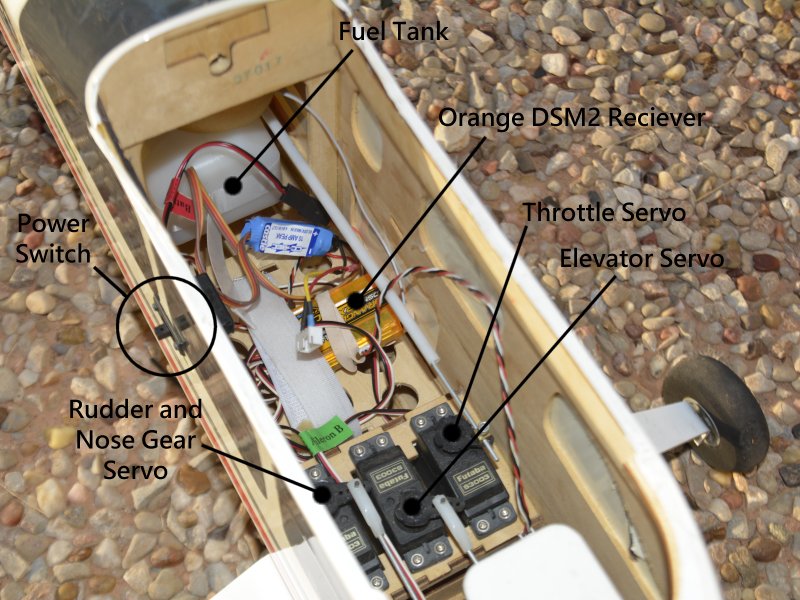
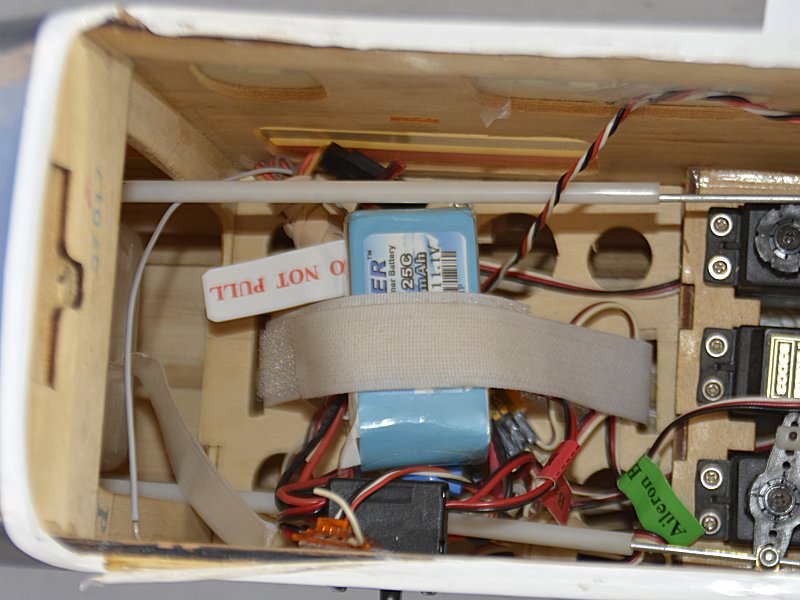
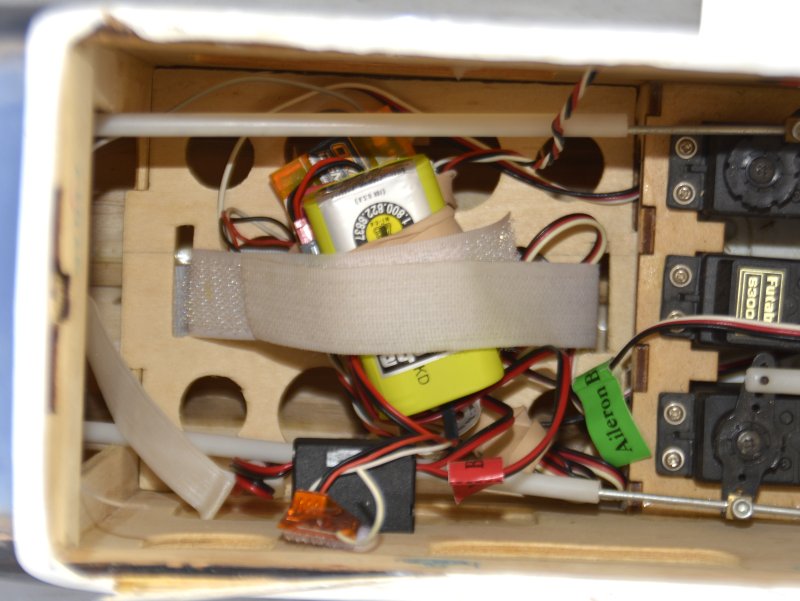
Use the pictures to the right to connect the servos to the correct channels on the receiver.
The power connection from the On/Off switch can be connected to any open channel. Do not use the Bind slot!
To bind the receiver to your radio, insert a bind plug into the Bind/S_Bus slot, then power on the aircraft. Set your radio to bind mode to connect. Remove the bind plug before flying.
Secure the battery and BEC (if used) into the battery compartment of the plane using the velcro strips next to the fuel tank. Verify that the wires from the battery do not interfere with the movement of the servos.
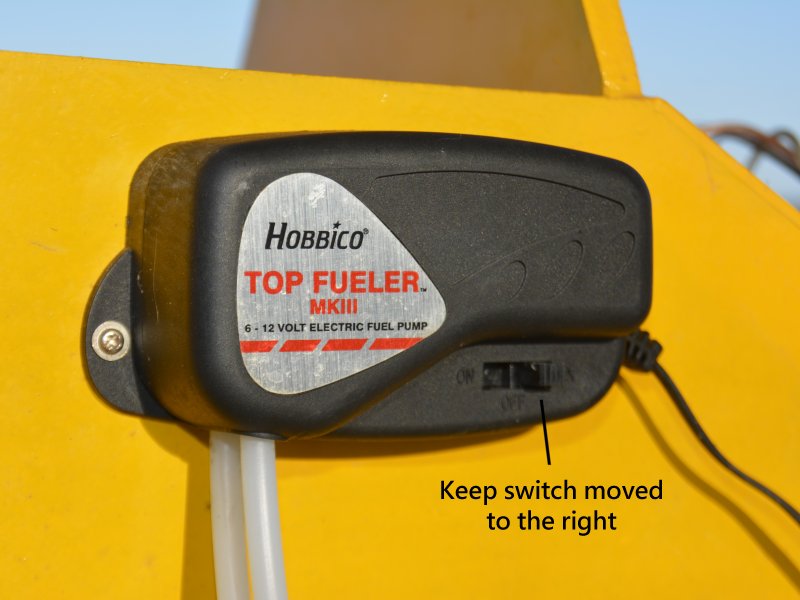
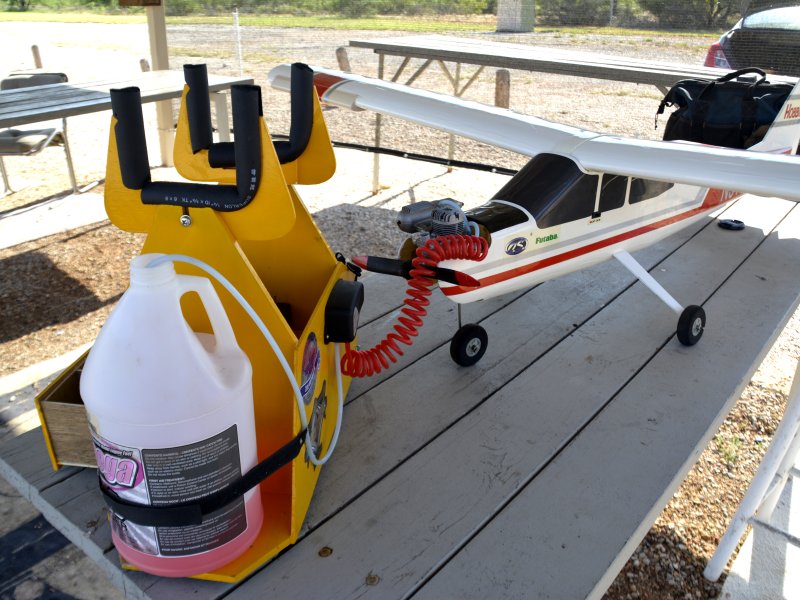
Fill the fuel tank on the airplane before installing the main wing, so you can see the fuel level in the tank. On the fuel pump move the switch to the right. On the Power Panel set the fuel pump switch to Fill.
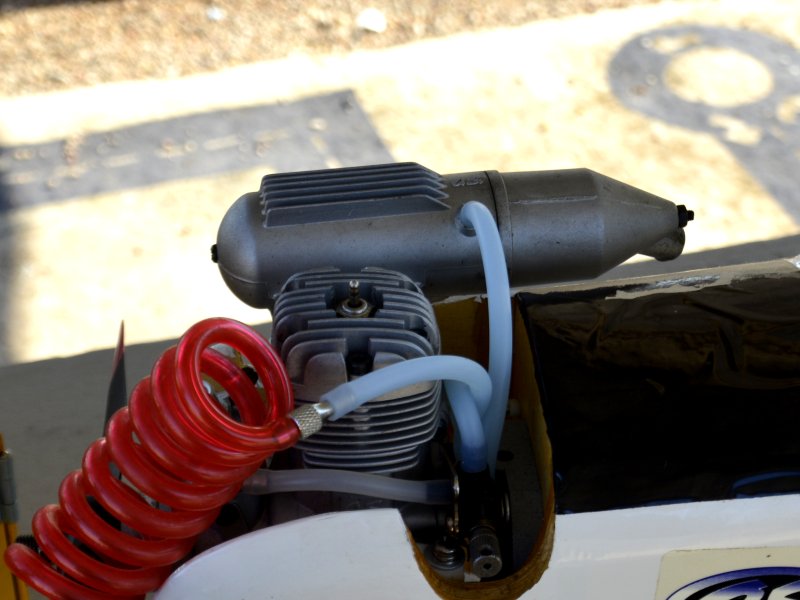
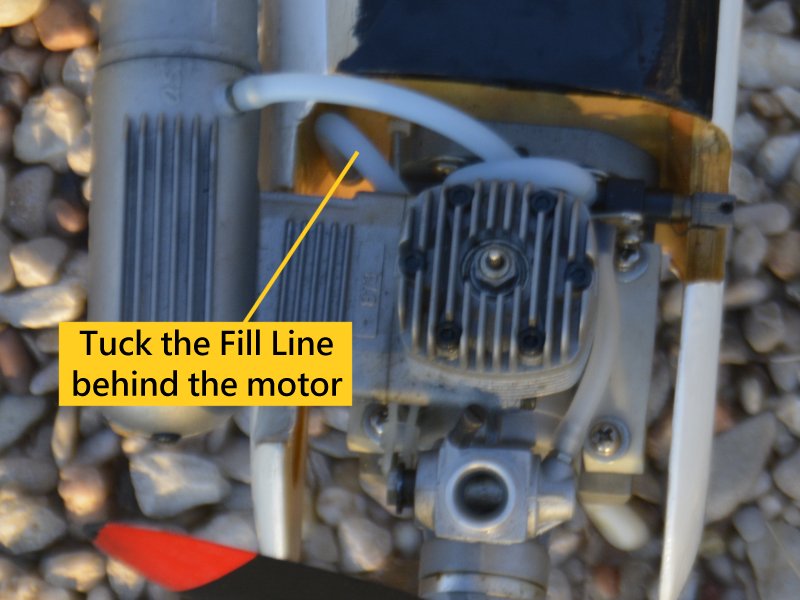
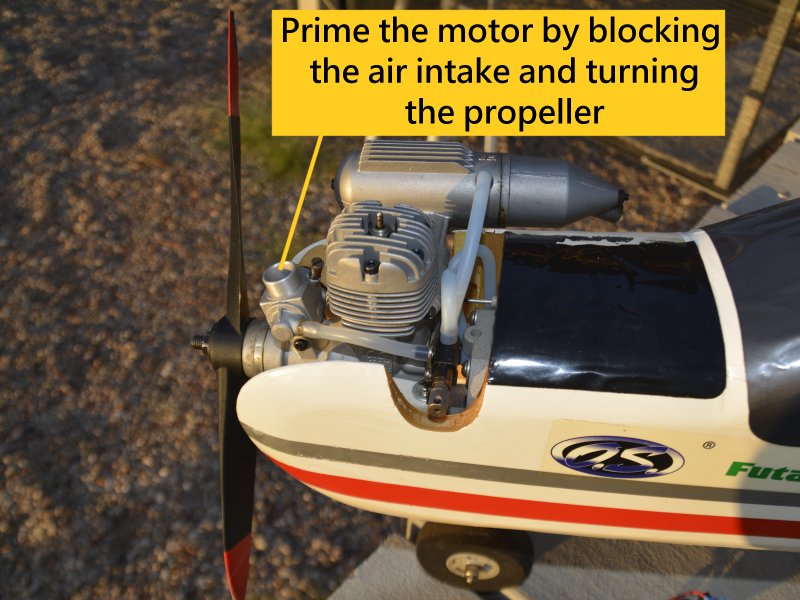
Find the fill line on the engine and remove the plug at the end of the line. Attach the fuel pump line to the fill line. Press the On/Off button on the Power Panel to start the pump. When fueling is complete, reinstall the plug into the fill line, then tuck the fill line behind the motor. Prime the motor by blocking the carburetor air intake and turn the propeller until fuel reaches the engine.
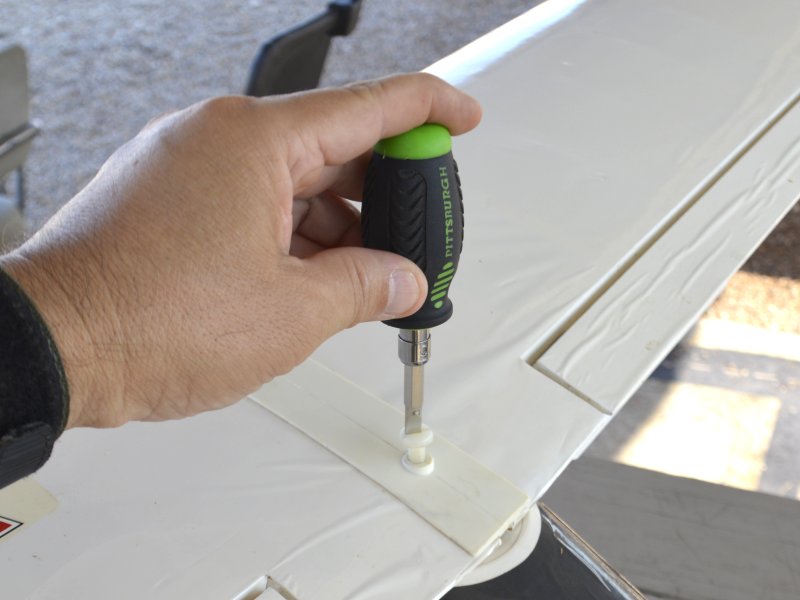
Before installing the main wing, flip the wing on its back and connect the wing servo to the receiver. Flip the wing over and install the wing, securing it with the nylon screw on the wing.
Set the glow plug dial to 1 on the Power Panel. Attach the glow plug starter to the glow plug on the aircraft. Twist clockwise to lock the starter onto the glow plug. Make sure the glow plug wire does not come into contact with the propeller. Adjust the dial on the power panel until the Amp meter reads 2.0 to 2.5 Amps. If the Amp meter shows 0 Amps, then the glow plug is bad.
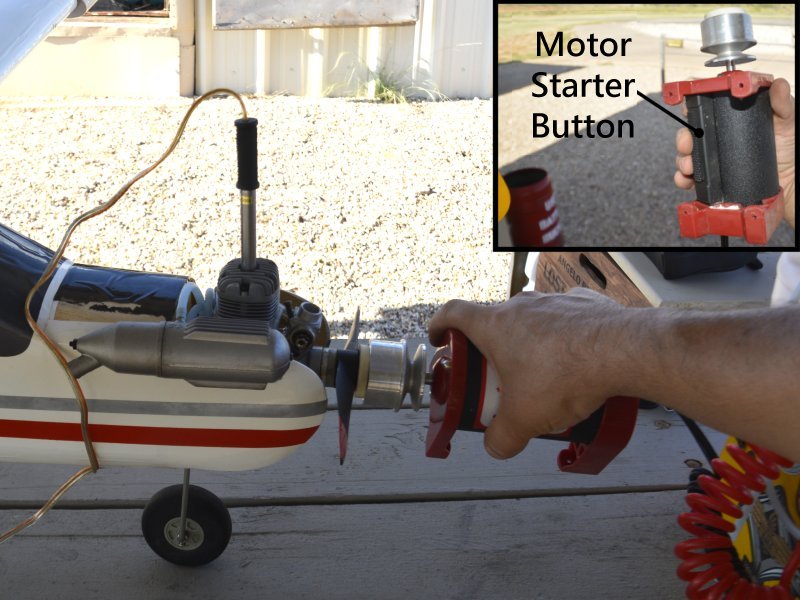
Set the throttle on your radio to about 2/3rds full. Press the motor starter to the propeller and push the motor starter button to spin the propeller. If everything is working properly, the engine should start. Carefully remove the glow plug starter by twisting it counter clockwise and lifting it off the plug.
Equipment Manuals
Click on one of the manuals below to open the PDF file in a new window.